Building Custom Chatbots with Atomic-Agents and OpenAI
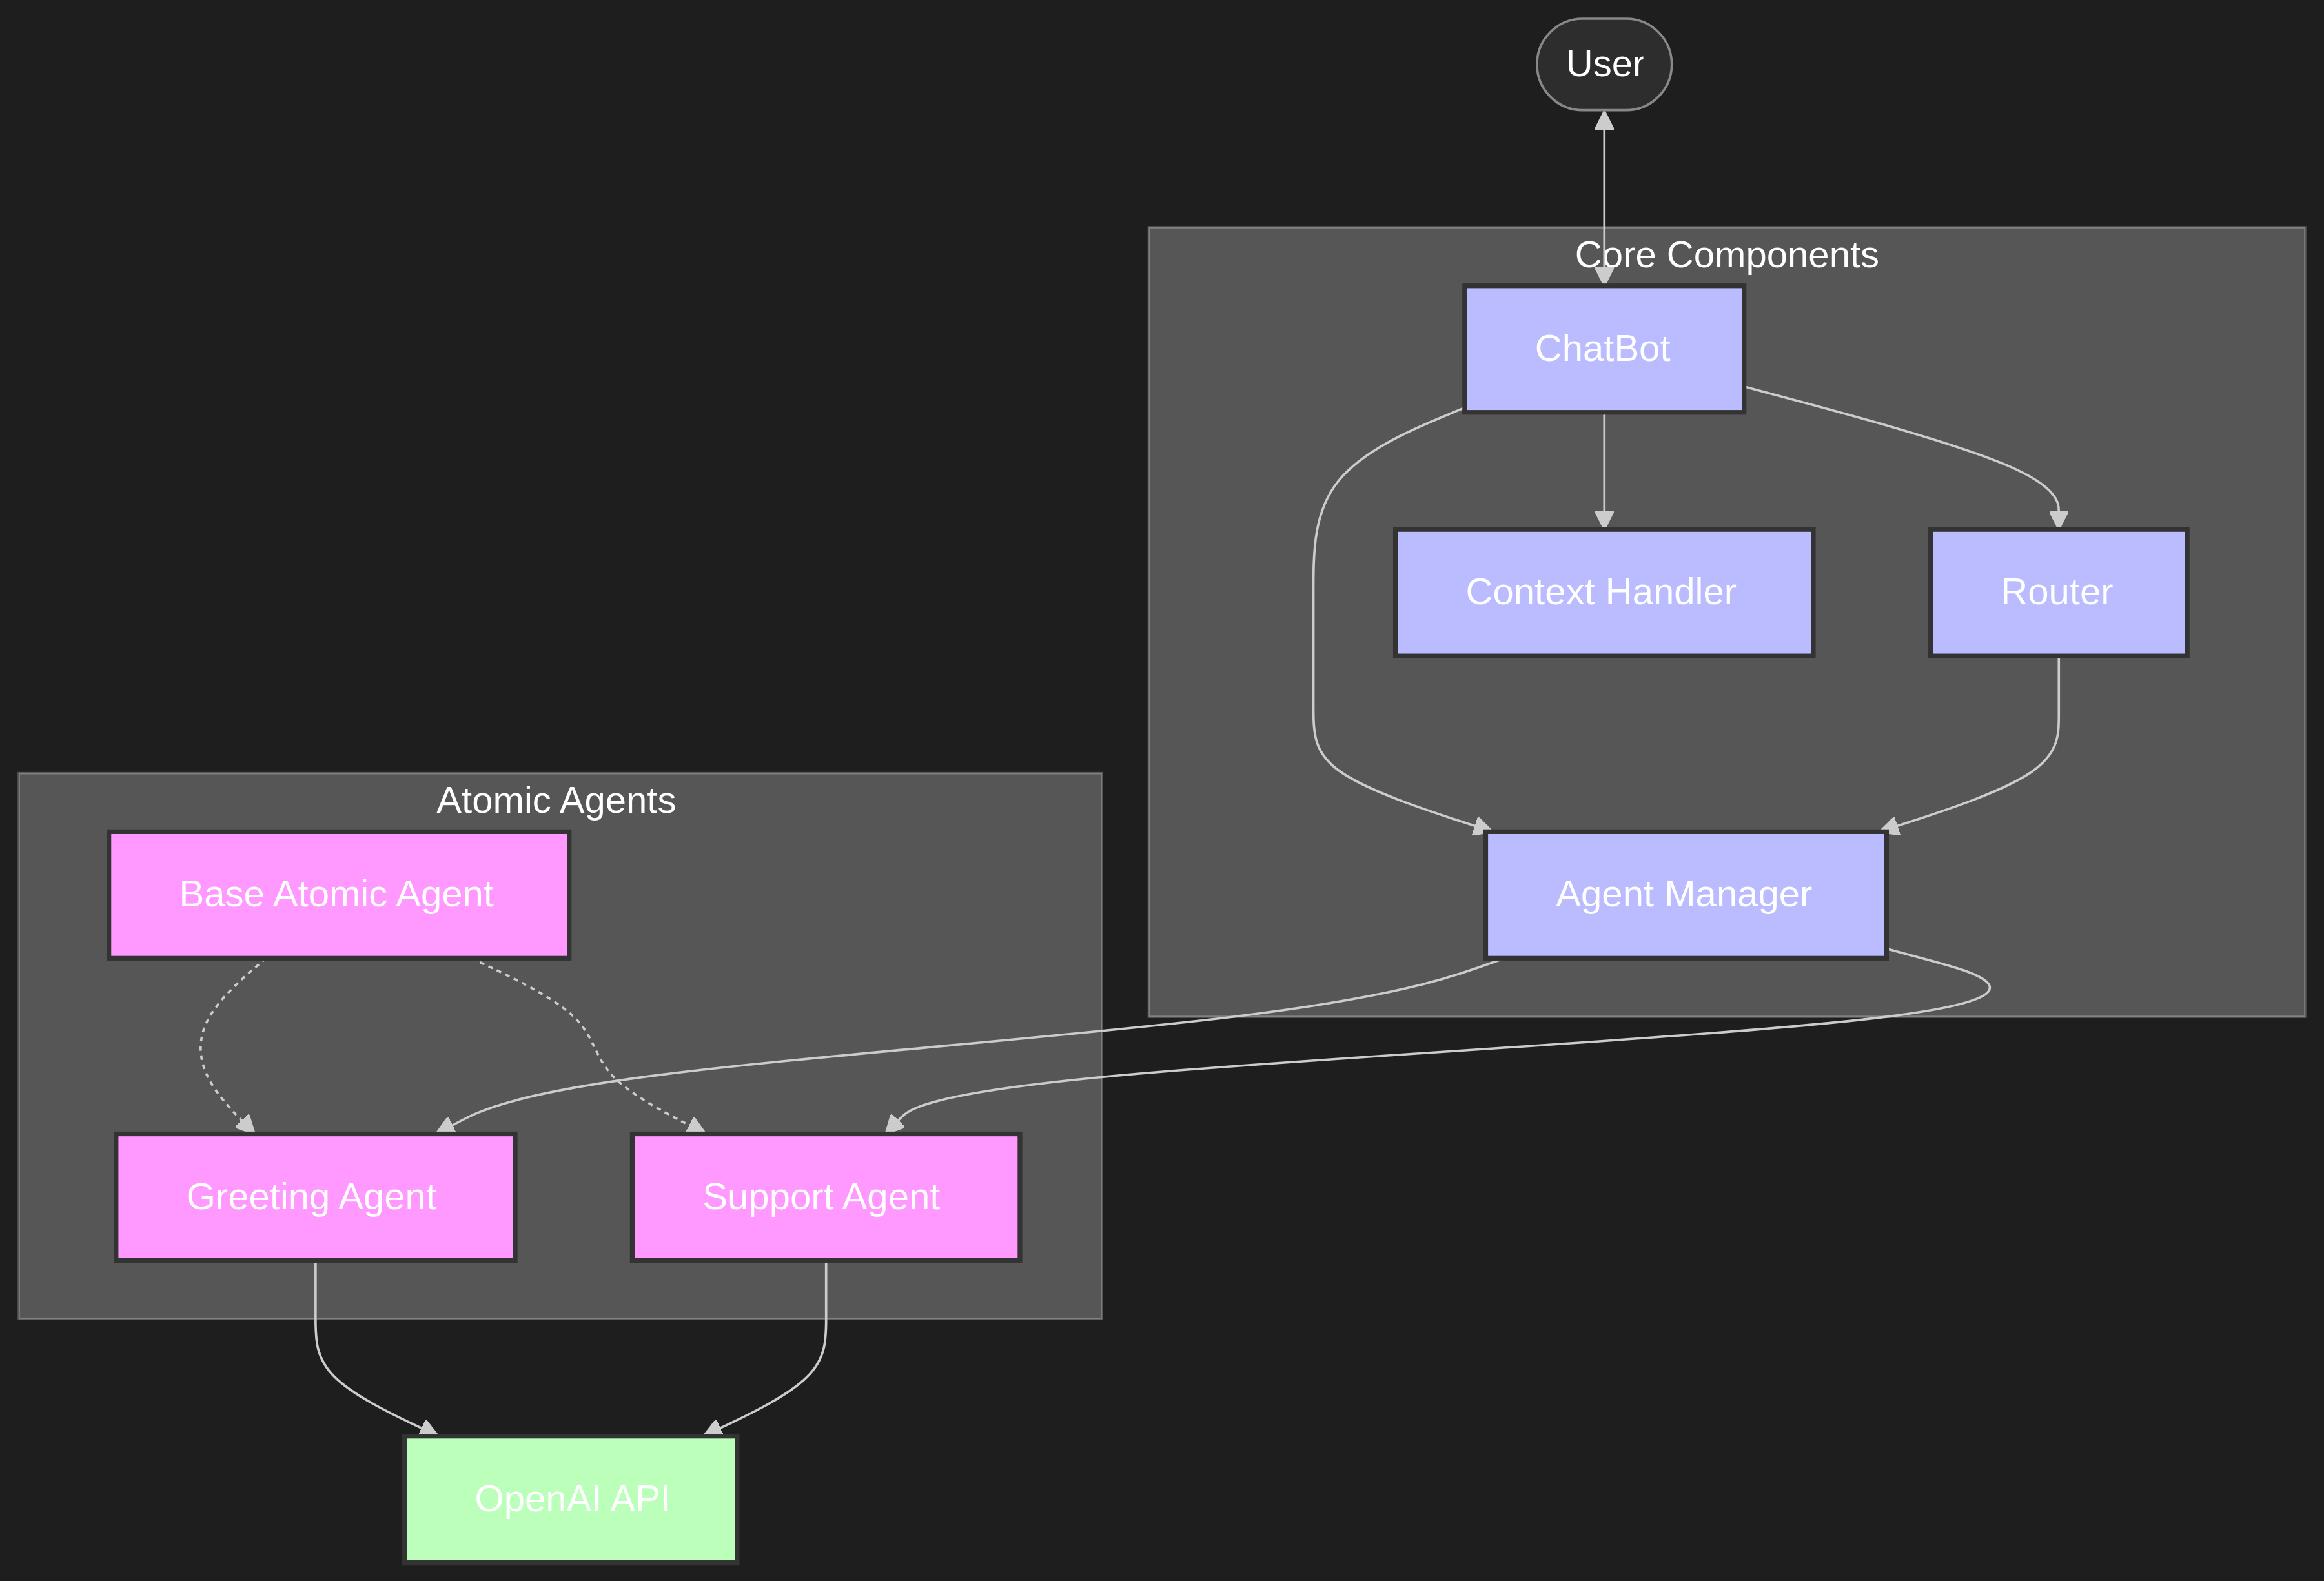
Introduction Atomic-agents are modular AI components designed to perform specific tasks within a larger conversational…
Introduction Atomic-agents are modular AI components designed to perform specific tasks within a larger conversational…
